Breast milk contains moisturizing properties that effectively nourish the skin.
It’s no wonder that breast milk baths are recommended for babies, but what about turning that precious breast milk into a handmade soap for your baby and other members of the family to enjoy? Is it possible?
Can you make soap from breast milk? Yes, you can make soap from breast milk. Breast milk can relieve eczema, acne, and other skin conditions. There are various recipes to create breast milk soap. Some use existing soap while others involve actually making the soap yourself either from a kit or using the cold process soaping method.
Read on to learn more about the benefits of breast milk soap and how to make your own at home.
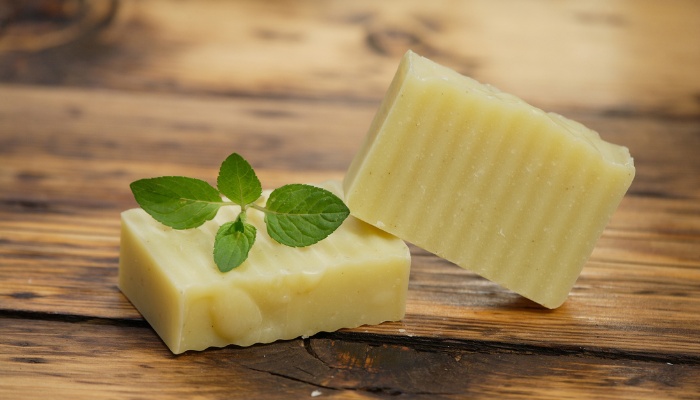
Breast Milk Soap Benefits
Breast milk’s high fat and sugar content help create creamy, silky soap. It also has nutrients and vitamins that nourish the skin and prevent infection.
You can use it for regular baths or to treat your baby’s rashes, eczema, or psoriasis. Besides being great for moisturizing your baby’s skin, the whole family can use it as well.
Is Soap Made From Breast Milk Safe?
Yes, soap made from breast milk is safe. Your whole family can benefit from breast milk’s nutrients, vitamins, fats, and sugars.
It’s also safe for newborns and babies with sensitive skin. If it’s safe enough for your baby to consume, it’s safe to use on your baby’s skin.
Is Breast Milk Soap Good for Acne?
Yes, breast milk soap is good for acne. The lauric acid found in breast milk has antibacterial characteristics that help fight acne.
If your baby or someone else in your family has acne, clean the face with clear water, wash with breast milk soap, rinse with water, and pat dry with a towel.
Is Breast Milk Soap Good for Eczema?
Yes, breast milk soap is good for eczema. The high fat content in breast milk makes a creamy soap that can be soothing for dry, itchy skin.
It’s safe for babies with sensitive skin to bathe with breast milk soap to get relief from their unpleasant symptoms.
Does Breast Milk Soap Help With Psoriasis?
Yes, it’s possible that breast milk soap has qualities that can help with psoriasis.
While there is no scientific evidence to suggest that breast milk soap treats psoriasis, the nutrients and vitamins in breast milk can relieve dry, itchy skin and lighten dark spots.
Breast Milk Soap Ingredients
Since there are so many breast milk soap recipes, you’ll find different breast milk soap ingredients, but most recipes include the following:
- Breast milk
- Lye (sodium hydroxide)
- Nourishing oils
- Scented essential oils, such as chamomile, lavender, or geranium
- Oatmeal
Breast Milk Soap Recipes
Find a breast milk soap recipe that works best for you and your family.
#1. Breast Milk Soap From Soap You Have at Home
If you’re looking for a super-easy breast milk soap recipe, try adding breast milk to some soap you already have at home.
Supplies Needed
- Several tablespoons of room-temperature breast milk
- Soap scraps or a bar of soap
- Microwave-safe bowl
- Spoon for stirring
- Soap molds in the shape of your choice
Directions
- Grate the soap, and add the shavings to a microwave-safe bowl.
- Gently warm the soap in 30-second increments until melted, stirring after each session.
- Add 1-2 tablespoons of breast milk for every cup of soap.
- Stir to incorporate, and warm one more time for 30 seconds.
- Pour the soap mixture into your soap molds.
- Once the soap is fully hardened, carefully remove them from the molds. Enjoy!
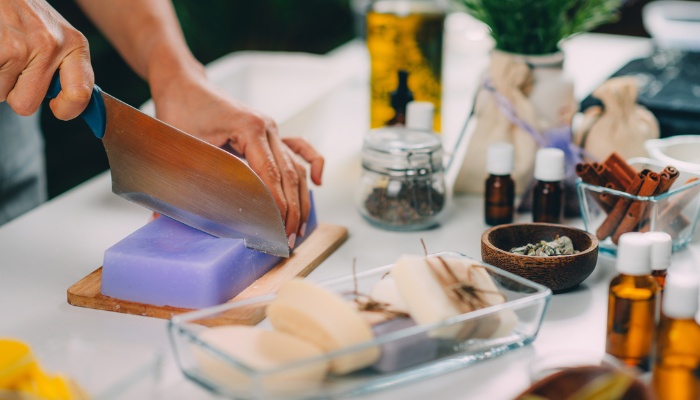
#2. Breast Milk Soap Without Lye
To make breast milk soap without having to use existing soap bars or handle lye, you need to use the melt-and-pour method, which allows you to pour breast milk directly into a melted soap base.
Supplies Needed
- Sharp knife
- Measuring cup
- Kitchen scale
- Microwave or water bath/double boiler
- Wooden spoon or whisk
- Soap molds
- Spray bottle with rubbing alcohol
- Soap base, 7 ounces
- Room temperature breast milk, 5 ounces
- Honey, ½ teaspoon
- Essential oil of your choice, 15 drops (lavender works great)
Directions
- Use the sharp knife to cut the soap base into smaller chunks, collecting them in the measuring cup.
- Cut them until you have 7 ounces (200 grams).
- Microwave the soap base at 20-second intervals, mixing between intervals, or boil it on medium heat in a double boiler, and mix it between bursts.
- Allow the soap base to cool to 130 degrees Fahrenheit.
- Pour the breast milk into the melted soap base, and stir.
- Whisk the honey into the mixture until there are no clumps.
- Stir in essential oils.
- Put the soap molds on a sturdy surface, and pour the soap mixture into the molds.
- Spray the top of the mold with rubbing alcohol to reduce air bubbles and to improve the final appearance.
- Let the soap cool and harden in the fridge for a few hours.
- Take the soap out of the molds and store them in a cool area out of direct sunlight.
#3. Cold Process Breast Milk Soap Recipe
Using breast milk soap with lye through the cold process method allows the soap to last longer. Lye can cause harmful skin reactions when safety guidelines are not followed. Follow these precautions when working with lye:
- Wear latex or rubber gloves
- Work in an area with adequate ventilation
- Wear eye protection
- Wear a long-sleeved shirt
- Do not allow pets or children in the area while you are working
- Do not use any bowls, spoons, stick blenders, etc. that have come in contact with lye for kitchen use. These are now your dedicated soap-making gear
- Use an accurate digital scale for precise measuring
*For more detailed instructions, please visit the original recipe here.
Supplies Needed
- Breast milk, 10.4 ounces
- Lye, 4.35 ounces
- Castor oil, 1.2 ounces
- Extra virgin olive oil, 22.3 ounces
- Coconut oil, 8 ounces
- Ice cube tray
- Plastic container
- Large bowl with ice
- Spoon
- Digital scale
- Thermometer
- Stick blender
- Soap molds
Directions
- Pour the breast milk into an ice cube tray and freeze the day before.
- Put the frozen milk cubes in a plastic container.
- Put the plastic container in a large bowl with ice.
- Slowly mix in the lye while repeatedly stirring
- Stir for an extra minute after the lye has dissolved entirely
- Let the mixture cool to 90-100℉
- Combine the oils, and warm them in the microwave to approximately 100℉
- Slowly add the lye/milk mixture to the oils.
- Use a stick blender to pulse the ingredients until it reaches medium trace (thinner than pudding but leaves an outline when drizzled)
- Pour the soap mixture into molds
- Freeze the soap molds for 24-48 hours
- Let it sit at room temperature for a full day
- Take the soap out of the molds
- Allow the soap to cure for six weeks before use.
Options Add-Ins
All you need to use for breast milk soap is breast milk and a soap base. Any of these breast milk soap add-ins are optional:
- Scented essential oils
- Fragrance oils for soap making
- Honey
- Poppy seeds, oatmeal, etc. for exfoliating properties
- Soap colorants (powdered micas, liquid soap-making colorants, natural colorants, etc.)
Best Soap Base for Breast Milk Soap
In order to make breast milk soap, you need a good soap base. Here are some easy options to get you started.
Saponify Melt and Pour Soap Base Sampler Kit
If you’re making breast milk soap for the first time, you may want to try this sampler kit. It has eight options for you to use as a breast milk soap base:
- White
- Shea butter
- Avocado butter
- Clear
- Coconut milk
- Aloe
- Charcoal
- Olive oil
These extra-hard soap bases have a high melting point that allows you to make gentle, long-lasting bars of breast milk soap.
Our Earth’s Secrets Shea Butter Melt and Pour Base
Shea butter is an excellent breast milk soap base because of its moisturizing and softening qualities.
Besides 5% added refined shea butter, this soap base also has other moisturizing nutrients such as coconut oil and oatmeal. It produces a creamy lather to nourish your baby’s skin.
Breast Milk Soap Kit
If you’d like help making your breast milk soap, get a kit with all the tools you need to make healthy soap from your breast milk.
DIY Melt & Pour Shea Butter Soap Making Kit
This starter kit has all the supplies and ingredients you need to make breast milk soap, along with instructions on how to use everything. All you need to do is add your own breast milk to the mix. The kit includes:
- 12 homemade wraps labels
- 2 pounds of shea butter soap base
- 2 dry flowers
- 2 square containers
- 1 stirring stick
- 6 essential oils for fragrance
- 1 measuring cup
- 6 liquid dyes for color
How Long Does Soap With Breast Milk Last?
Soap with breast milk lasts four to six weeks or longer than six months, depending on the method you use to make it.
Store melt-and-pour breast milk soap in the refrigerator for a longer shelf life. Cold process breast milk soap lasts at least six months. Throw out your soap if it has a weird smell.
Does Breast Milk Soap Need To Be Refrigerated?
Yes, breast milk soap needs to be refrigerated if you use the melt-and-pour method to make it. Keep breast milk soap in a sealable bag in the refrigerator until you use it.
Cold process breast milk soap can last six months or much longer if made correctly and you keep it away from direct sunlight and humidity.
Can You Sell Breast Milk Soap Legally?
Yes, you can sell breast milk soap legally in the United States. Breast milk soap has health benefits for your skin.
Remember that the FDA prohibits you from making specific health claims about your breast milk soap, even if you have enough evidence to support them.
Final Thoughts
Well, now you have three different options for turning that unused breast milk into something beautiful and useful.
I’d recommend starting with the first or second option if you’ve never made soap before, but once you get some experience, definitely try out the cold process method – you’ll be hooked for a lifetime!
Mom of three (including identical twin boys), wife, and owner of Parents Wonder. This is my place to share my journey as a mother and the helpful insights I learn along the way.